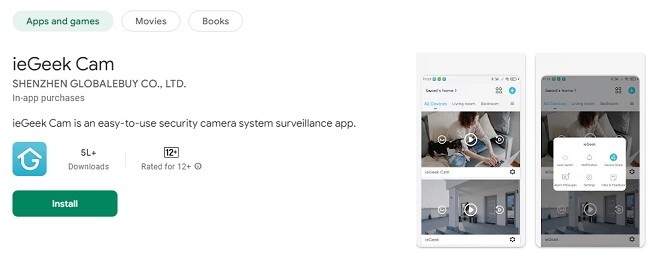
How to download Install ieGeek Camera on Android Smart TVs: Troubleshooting, Reviews & FAQs
The ieGeek Camera is a popular webcam known for its affordable price and solid performance, primarily used for laptops, desktops, and other personal devices.
However, as Android Smart TVs become more integrated into home entertainment setups, many users are wondering how to connect and use their ieGeek Camera with these smart TVs for video calls, streaming, or security purposes.
While Android Smart TVs generally do not come with built-in camera support, it's possible to use an external camera like the ieGeek Camera by following specific steps.
In this comprehensive guide, we’ll walk you through the installation process, troubleshooting tips for when it’s not working, and share user reviews.
Additionally, we’ll provide answers to frequently asked questions to help you get the most out of your camera.
System Requirements to install ieGeek Camera on Smart Tv's
Before attempting to install the ieGeek Camera on your Android Smart TV, ensure that both your TV and the camera meet the following requirements:
Android Smart TV: Version 5.0 (Lollipop) or higher is recommended for better compatibility.
USB Port: Your TV must have an available USB port to connect the camera.
Camera: The ieGeek Camera should have a USB interface for easy connection to the TV.
Internet Connection: A stable internet connection is necessary for apps that support video calls or streaming services.
How to Install the ieGeek Camera on Android Smart TVs
Installing the ieGeek Camera on an Android Smart TV is a bit different than on a computer or mobile device, as Android TVs generally don’t have native support for external webcams.
However, with the right approach, you can still use the camera for various purposes.
Step 1: Check for USB Port Availability
Most Android Smart TVs come with at least one or two USB ports. These ports are typically used for connecting USB drives, keyboards, or other peripherals.
The ieGeek Camera needs to be connected via one of these USB ports.
Locate the USB Port: On your Android TV, locate the USB port. This is usually on the back or side of the TV.
Plug in the Camera: Insert the USB cable of the ieGeek Camera into the available USB port.
Step 2: Install Required Apps
Android Smart TVs do not natively support webcams for all functions. To use the ieGeek Camera for video calls or streaming, you may need to install a compatible app.
Some apps allow you to use external cameras for video conferencing or streaming.
Install Video Calling Apps: Apps like Zoom, Skype, or Google Duo are available on the Google Play Store for Android TV. These apps allow you to make video calls using external cameras.
Open the Google Play Store on your Android TV.
Search for the app you want to use (e.g., Zoom, Skype, Google Duo).
Install the app and sign in to your account.
Install Streaming Apps: If you want to use the ieGeek Camera for streaming on platforms like YouTube or Twitch, you’ll need a compatible app that supports webcam input.
Streamlabs or OBS Studio (via Android TV browser) may work with external cameras for streaming.
Install the app from the Google Play Store and follow the setup instructions.
Step 3: Configure the Camera in the App
Once the ieGeek Camera is connected and the necessary apps are installed, you need to configure the camera in the app settings. This will allow the app to recognize the camera and use it for video calls or streaming.
Open the Video Calling or Streaming App: Launch the app where you want to use the camera (Zoom, Skype, etc.).
Go to Settings: In the app’s settings, look for a section related to camera or video input.
Select the ieGeek Camera: If the camera is properly connected, it should appear as an option in the video settings. Select the ieGeek Camera as the input device.
Step 4: Test the Camera
After configuring the camera, it’s important to test it to ensure it’s working correctly.
Test Video Calls: Make a test video call using the app you installed. Check if the video and audio are clear.
Test Streaming: If you’re using the camera for streaming, test the camera feed in the app to ensure it’s working smoothly.
Troubleshooting: What to Do if the Camera is Not Working
If the ieGeek Camera is not working after installation, here are some troubleshooting steps you can follow:
1. Check USB Connection
Ensure that the camera is properly connected to the USB port. Try unplugging and reconnecting the camera to see if it gets recognized.
2. Update the TV Software
Outdated software can cause compatibility issues with external devices. To update your Android Smart TV:
Go to Settings.
Select About.
Choose Software Update and check for available updates.
3. Check App Permissions
Ensure that the app you’re using has permission to access the camera. On Android TV, go to Settings > Apps > Permissions, and make sure the camera permission is enabled.
4. Restart the TV
Sometimes, a simple restart can fix issues with device recognition. Turn off your Android TV, unplug it for a few seconds, and then plug it back in.
5. Test the Camera on Another Device
To rule out the possibility of a faulty camera, try connecting the ieGeek Camera to a laptop or desktop to see if it works. If it doesn’t work on other devices, there may be an issue with the camera itself.
User Reviews: What Do People Think of the ieGeek Camera on Android TV?
Positive Reviews
Affordable and Reliable: Many users appreciate the affordability of the ieGeek Camera compared to other high-end webcams. It offers solid performance for video calls and streaming at a budget-friendly price.
Easy Setup: Users report that the camera is easy to set up on Android Smart TVs once the necessary apps are installed.
Good Quality Video: Reviewers note that the video quality is clear and sharp, making it a great option for casual video calls and streaming.
Negative Reviews
Limited App Support: Some users have reported difficulty finding apps that support external cameras on Android TVs. This can be a limitation for those who want to use the camera for more than just video calls.
Camera Recognition Issues: A few users have experienced issues with the camera not being recognized by their Android TV, even after connecting it to the USB port.
No Autofocus: Some users have mentioned that the ieGeek Camera lacks autofocus, which can be an issue for those who need precise focus for streaming or presentations.
Frequently Asked Questions (FAQs)
1. Can I use the ieGeek Camera on my Android Smart TV for video calls?
Yes, you can use the ieGeek Camera for video calls on apps like Zoom, Skype, or Google Duo. Make sure to install the app and configure the camera in the app’s settings.
2. Why is my ieGeek Camera not being recognized by my Android TV?
If the camera isn’t recognized, check the USB connection, update the TV’s software, and ensure that the app has the necessary permissions to access the camera. Restarting the TV may also help.
3. Does the ieGeek Camera work with streaming apps like YouTube or Twitch?
Yes, you can use the ieGeek Camera for streaming on platforms like YouTube or Twitch. You may need to use apps like Streamlabs or OBS Studio for Android TV to stream with the camera.
4. How do I install apps like Zoom or Skype on my Android TV?
You can download apps like Zoom or Skype directly from the Google Play Store on your Android TV. Once installed, configure the camera in the app’s settings.
5. Does the ieGeek Camera have a built-in microphone?
Yes, the ieGeek Camera comes with a built-in microphone, which is useful for video calls. However, for better audio quality, you may want to use an external microphone.
6. Can I use the ieGeek Camera for security purposes on my Android TV?
While the ieGeek Camera is not specifically designed for security use, it can be used with certain apps that support surveillance features.
You may need to explore third-party apps that can integrate with external cameras for this purpose.
Conclusion
The ieGeek Camera is a versatile and affordable option for Android Smart TV users who want to use external webcams for video calls, streaming, or other purposes.
While the installation process may not be as straightforward as on laptops or desktops, following the steps outlined in this guide should help you get your camera up and running.
If you encounter any issues, troubleshooting steps like checking the USB connection, updating your TV software, and ensuring the correct app permissions can help resolve common problems.
Updates